DNS Configuration
Configuring the correct DNS records is the most important step in verifying your domain. These records tell the internet that you have authorized PushFire to send emails from your domain and provide the authentication information email providers need to trust your messages.
What Are DNS Records?
DNS records are entries in the Domain Name System that provide information about your domain. For email sending, you need several types of records that authenticate and authorize email delivery.
Think of DNS records as instructions you give to the internet about how to handle different aspects of your domain. Some records tell where emails should be delivered, others verify that you are the legitimate owner, and others authorize specific services to send on your behalf.
Types of DNS Records for Email
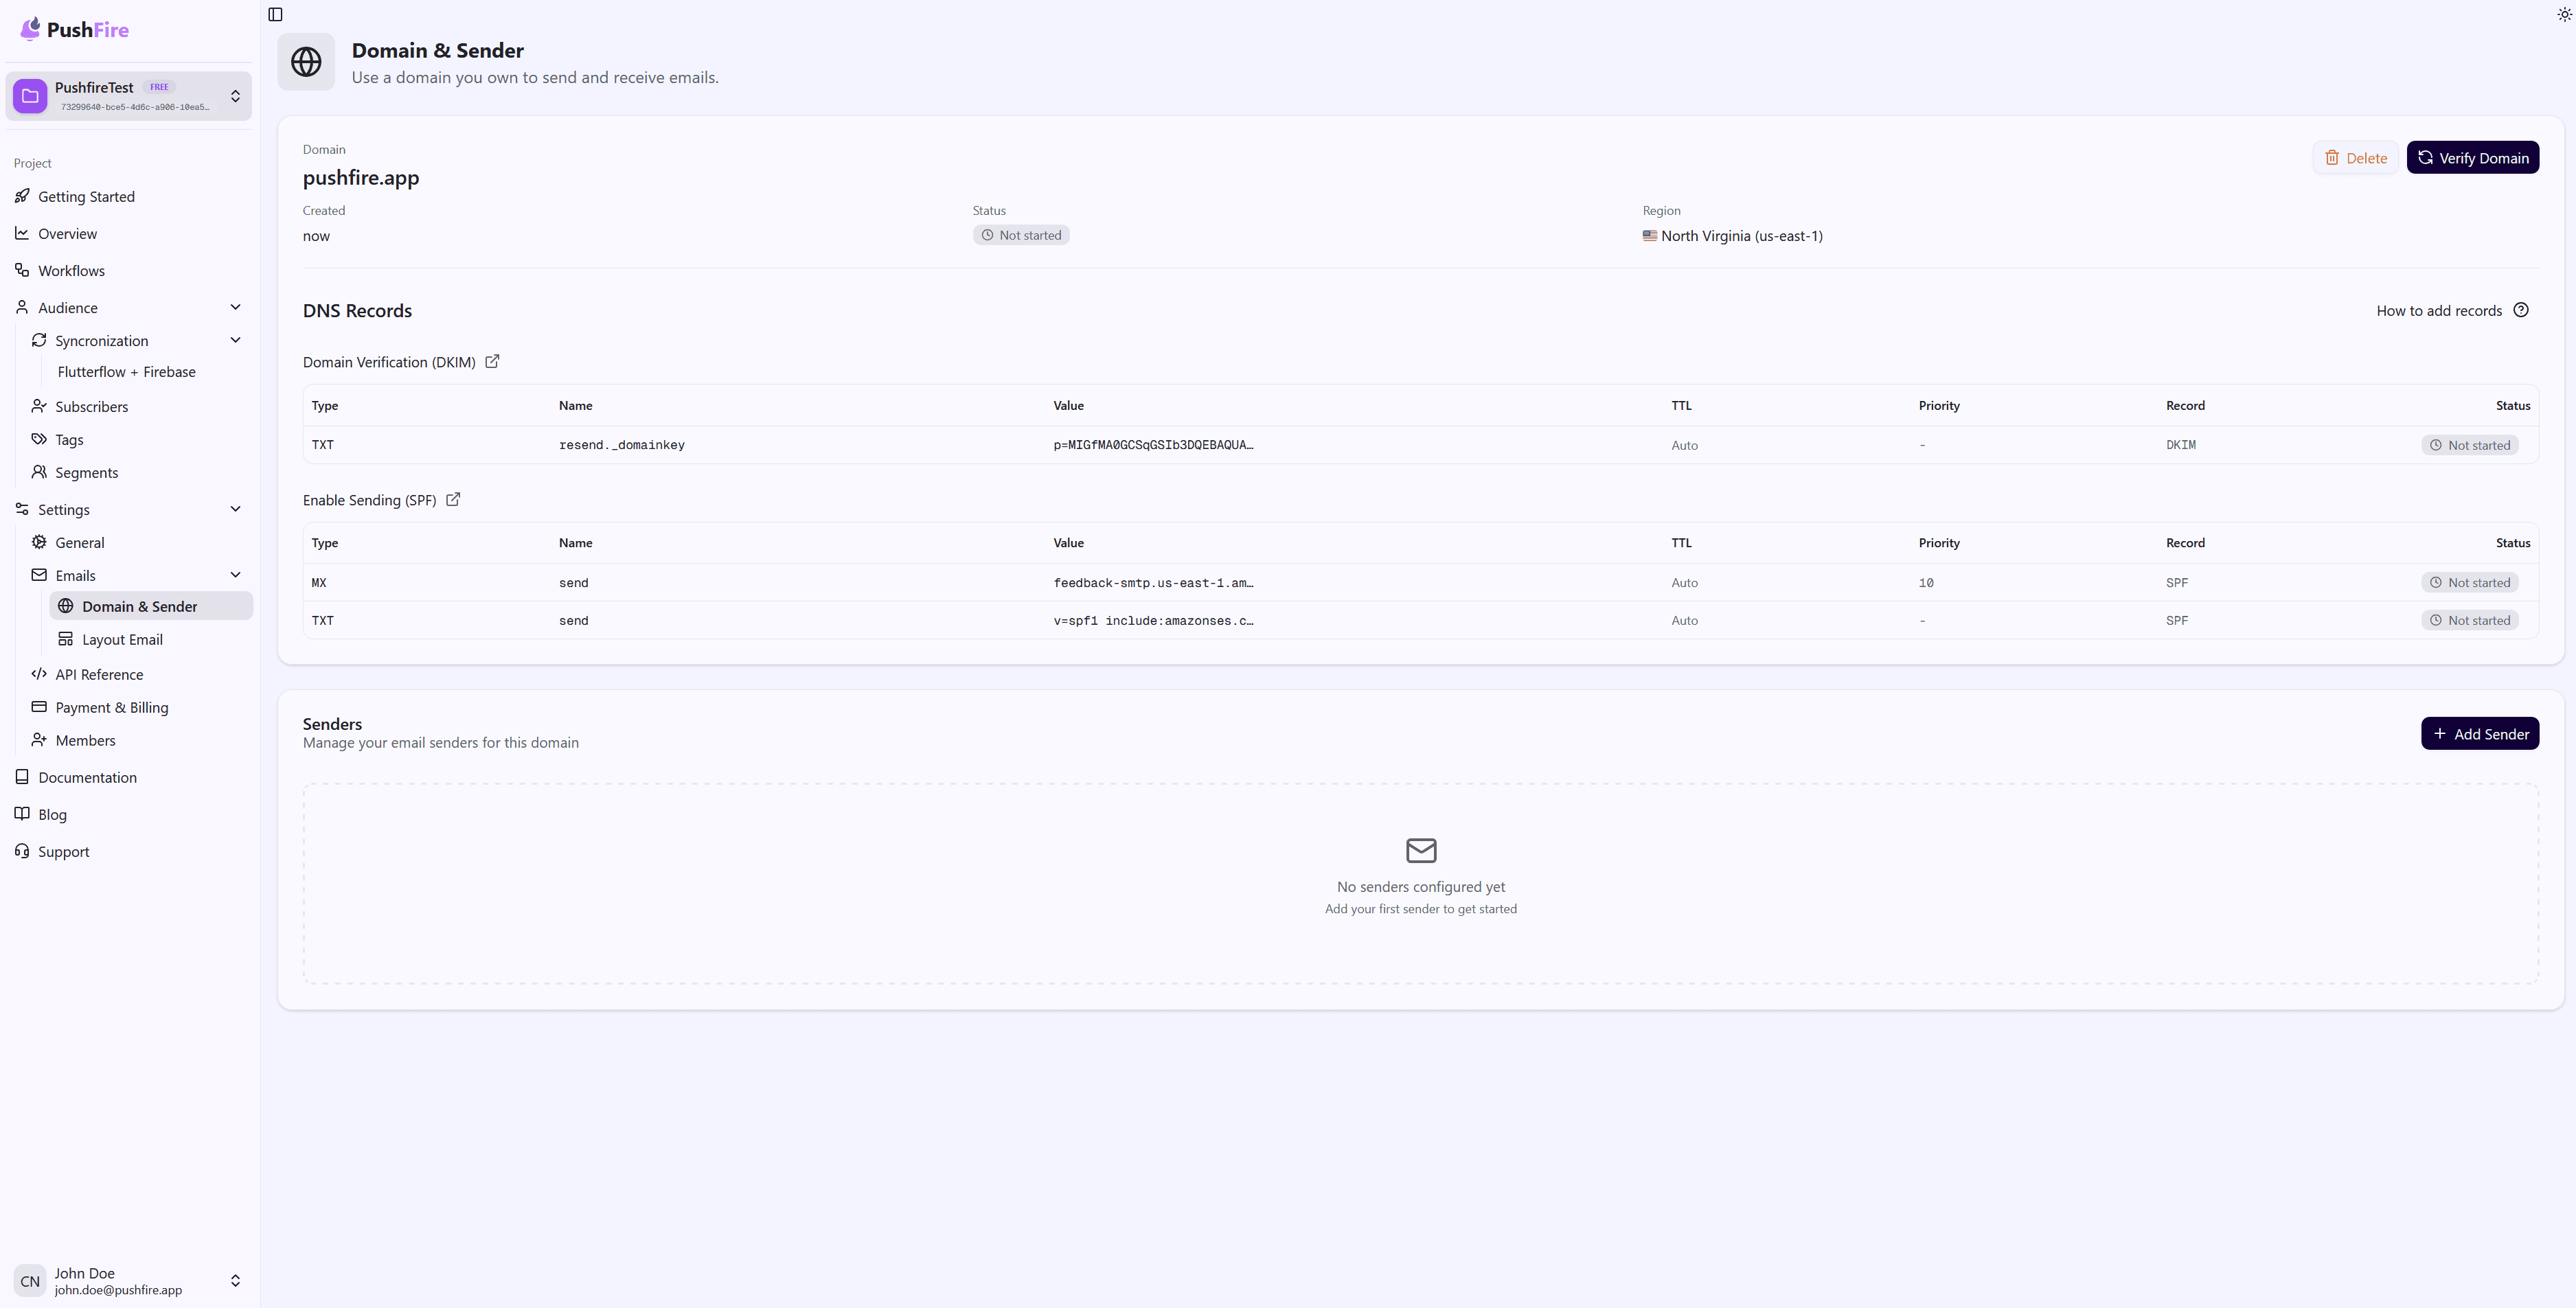
Domain Verification (DKIM)
DKIM (DomainKeys Identified Mail) is an email authentication method that verifies that an email actually comes from your domain and has not been modified in transit.
DKIM records are TXT records that contain a public key. When PushFire sends an email, it digitally signs the message using a private key. Email providers can verify this signature using the public key published in your DNS records, confirming that the email is authentic.
These records usually have names that include _domainkey and contain verification data provided by PushFire.
Enable Sending (SPF)
SPF (Sender Policy Framework) is a record that specifies which servers are authorized to send emails from your domain. It works like a guest list for your domain: only servers on this list are allowed to send emails that appear to come from your domain.
The SPF record is a TXT record at the root domain (or the subdomain you are using). It includes information about which services are authorized. For PushFire, this record authorizes Resend’s servers (our email provider) to send on your behalf.
A typical SPF record looks like v=spf1 include:resend.com ~all, which means “I authorize Resend to send emails, and everything else should be rejected.”
DMARC (Optional but Recommended)
DMARC (Domain-based Message Authentication, Reporting & Conformance) is a security policy that helps prevent spoofing and phishing using your domain.
Although optional, DMARC is highly recommended because it adds an extra layer of protection. It tells email providers what to do with emails that fail authentication checks and provides reports on how your domain is being used.
The DMARC record is a TXT record named _dmarc on your domain. It defines policies for handling emails that do not pass authentication.
Enable Receiving (MX)
MX (Mail Exchange) records specify which servers should receive emails for your domain. If you want to receive emails at your domain (not just send them), you need to configure MX records.
If you only want to send emails and not receive them, you can skip MX records. However, for a full email setup, MX records are required.
How to Add DNS Records
The exact steps vary slightly depending on your DNS provider, but the general process is the same:
Step 1: Get the Records from PushFire
When you create a domain in PushFire, the system automatically generates all the DNS records you need. These records are shown in the interface after creating the domain.
Each record includes:
- Record type (TXT, MX, etc.)
- Record name or host
- Full record value
- TTL (Time To Live), optional
Step 2: Access Your DNS Provider
Log in to the management panel of your DNS provider. This could be:
- The registrar where you purchased your domain (Namecheap, GoDaddy, etc.)
- A dedicated DNS service (Cloudflare, Route 53, etc.)
- Your hosting provider’s control panel, if DNS is managed there
Step 3: Add Each Record
For each record provided by PushFire:
- Find the option to add a new DNS record
- Select the correct record type (TXT, MX, etc.)
- Enter the exact record name (sometimes called “Host” or “Name”)
- Paste the full record value (sometimes called “Content,” “Value,” or “Data”)
- Enter the TTL if requested (use the default or the value provided by PushFire)
- For MX records, also enter the priority if required
Step 4: Save and Wait
After adding all records, save the changes. DNS updates take time to propagate. Some providers update almost instantly, while others can take up to 48 hours, though it usually takes minutes to a few hours.
Verifying the Records
Once the DNS records are added, you can verify them using online tools such as:
- DNS lookup tools that query your domain records
- Email-specific verification tools for SPF, DKIM, and DMARC
PushFire also automatically checks the records when you click Verify Domain. The system queries your DNS and confirms that all required values are correct.
Common Troubleshooting
Records Do Not Appear
If verification fails after adding the records, check that:
- You copied the values exactly, including quotes and spacing
- The record name is correct (some providers require the full domain name, others only the subdomain)
- The changes were saved in your DNS provider
- You waited enough time for DNS propagation
Verification Takes Too Long
DNS propagation can take time. If several hours have passed and verification still fails:
- Confirm the records are actually saved in your DNS provider
- Use a DNS lookup tool to ensure the records are publicly visible
- Try verifying again in PushFire
Syntax Errors
If you receive syntax-related errors:
- Make sure no characters were added or removed when copying values
- Check for extra spaces at the beginning or end of the values
- Some DNS providers have length limits; if a value is long, ensure it was saved completely
Best Practices
Copy Exactly: DNS record values are sensitive. A single extra space or missing character can cause verification to fail. Always copy and paste instead of typing manually.
Double-Check: After adding records, confirm they are saved correctly in your DNS provider before verifying in PushFire.
Do Not Remove Existing Records: If your domain already has DNS records, do not delete them unless you are sure they are no longer needed. Some may be required for other services.
Document Your Changes: Keep a record of which DNS entries you added and when. This makes troubleshooting easier later.
Next Steps
Once all DNS records are added and your domain is verified, you can move on to configuring your senders. Senders are the specific email addresses you will use as the “from” address in your emails.