Create your first project
Getting Started
🎯 What is a Project in PushFire?
A project is your dedicated workspace where you can:
- Manage a specific audience of subscribers
- Create and run automated workflows
- Send push notifications via Firebase
- Send transactional emails via Resend
- Analyze metrics and results
Each project is fully independent, allowing you to organize different products, brands, or campaigns separately.
🚀 Create Your First Project
Step 1: Access the Project Creator
- From the Main Dashboard:
- Click the "New Project" button
- Or navigate to "Projects" → "Create New"
- From the Navigation Bar:
- Use the project selector at the top
- Select "+ Create Project"
Step 2: Main Information
Project Name
- Required Field: Choose a descriptive and unique name
Examples: - "E-commerce MyStore" - "MovilPay App - Notifications" - "TechNews Blog - Engagement"
Description
- Required Field: Briefly describe the purpose of the project
Example: "Retention and conversion campaigns for our online store"
Step 3: Firebase Configuration
Firebase Project ID
- Required Field: Your Firebase project's unique identifier
- Found in the Firebase console
- Example: my-firebase-project-123
Firebase Credentials
- Required Field: Firebase Service Account JSON file
How to get your credentials:
- Go to Firebase Console
- Select your project
- Go to Project Settings → Service Accounts
- Click "Generate new private key"
- Download the JSON file
- Upload it using the file upload component
⚠️ Important:
- This file contains sensitive credentials
- Once saved, it will not be shown again for security reasons
At this point, you are ready to start with the integration process, however we recommend going through verification and customization processes below:
✅ Verify Configuration
Pre-Creation Checklist
Basic Information
- Project name defined
- Clear project description
- Information consistent with your strategy
Firebase Configuration
- Correct Firebase Project ID
- Valid JSON credentials file
- Firebase project configured for push notifications
Automatic Validation
The form automatically validates:
- Email format: Checks that addresses are valid
- API Key format: Confirms it starts with re_
- JSON file: Validates the structure of Firebase credentials
- Required fields: All fields marked with * are mandatory
🎨 Customize Your Project
Visual Settings
Once your project is created, you can customize:
- Dashboard Theme: Light or dark
- Preferred Layout: Compact or spaced
- Overview Widgets: Metrics you want to see first
🚀 Next Steps
Once your project is created, you will have access to:
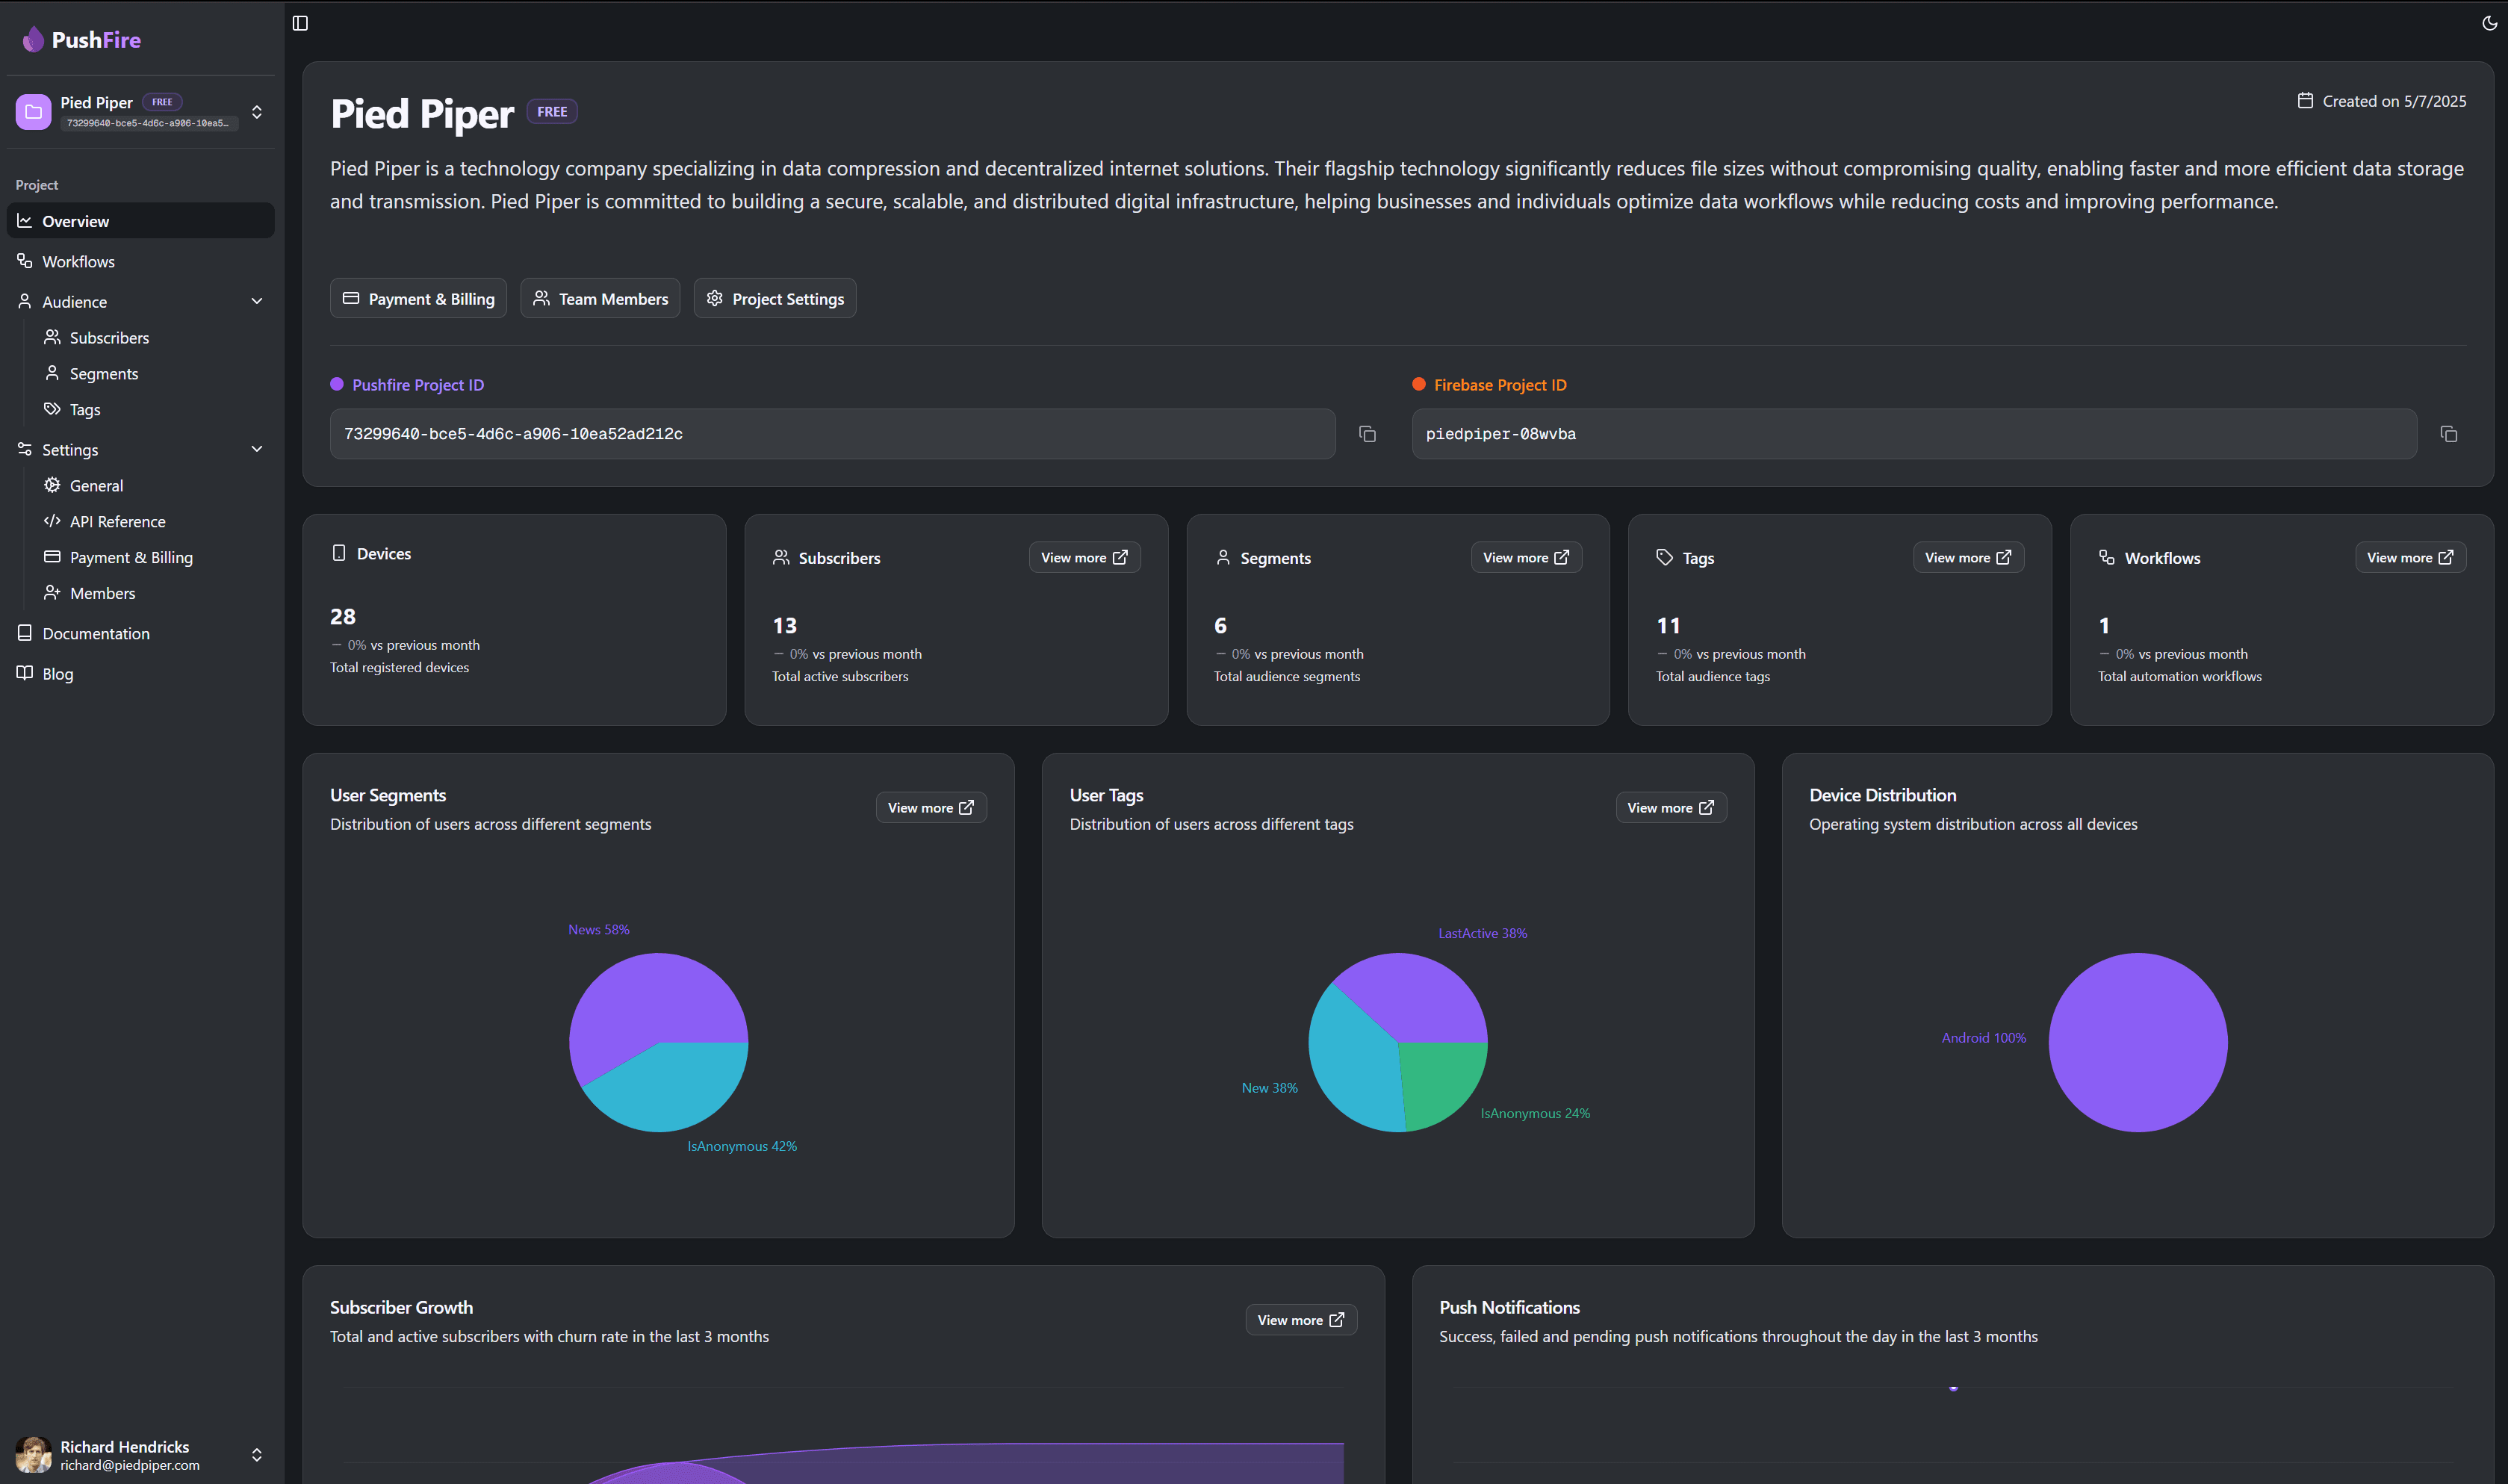
Project Dashboard
- Overview: General metrics and recent activity
- Workflows: Workflow builder
- Audience: Subscriber, segment, and tag management
- Settings: Advanced project configuration
💡 Tips and Best Practices
Naming Conventions
- Use descriptive and consistent names
- Include purpose or channel in the name
- Avoid special characters or excessive spaces
Organization
- Create separate projects for different products
- Use a project per environment (development, production)
- Keep small teams per project for better control
Security
- Regularly review user permissions
- Rotate API keys periodically
- Keep Firebase credentials up to date
Performance
- Set reasonable sending limits
- Use segmentation to optimize delivery
- Regularly monitor performance metrics
🚨 Common Troubleshooting
Error: Invalid Firebase Project ID
- Ensure the Project ID is correct
- Confirm the project exists in Firebase Console
- Verify you have permissions on the project
Error: Invalid Firebase Credentials
- Download a new credentials file
- Check the JSON file is not corrupted
- Confirm credentials are for a Service Account